What is WordPress?
WordPress is a very popular content management platform (CMS) that allows you to create and manage websites and blogs. However, when people talk about the platform, they might be referring to "WordPress.com" or "WordPress.org," and they are actually two different platforms that only share the same name. The most striking difference between the two is how they are hosted.
"WordPress.org" is often cited as a self-hosted WordPress because you have to install the CMS on your site. Many WordPress hosting providers offer one-click installations, making the process much easier. This type of hosting does not require any technical experience to have your WordPress site. With WordPress.org, you need to find and pay for a separate web hosting service. This offers more control over the server, allowing you to choose a host that meets your specific needs, and you have total freedom to install custom plugins, custom themes, and make deep changes to the WordPress source code. This makes it ideal for developers and website owners who want to customize their site as much as possible.
On the other hand, "WordPress.com" offers a service to you in addition to blog software. You can choose from a variety of plans, including a free one. This is ideal for beginners and for those who do not want to deal with technical hosting issues, but customization options are limited in the free plans. You cannot install custom plugins or custom themes on free plans. Customization options are broader in the paid plans, but there are still limitations compared to WordPress.org.
The choice between "WordPress.com" or "WordPress.org" will depend on your specific needs, level of technical experience, and budget.
Tutorial for Creating a Website Using WordPress
In this tutorial, I will show how to make a website on WordPress by creating a site for a fictional barber shop as an example.
Step 1: Choose a Domain and Hosting Before you begin, you will need a domain name (example: www.yoursite.com) and a web hosting service. There are several hosting options, such as Hostinger, HostGator, and GoDaddy, which offer WordPress-friendly plans. Choose a plan according to your needs and follow the instructions to register your domain and set up your hosting.
Step 2: Install WordPress Most hosting services offer easy WordPress installation. Generally, you can do this through your hosting control panel. Follow your hosting provider's instructions to install WordPress on your domain.
Step 3: Access the WordPress Control Panel After installing WordPress, you can access the control panel (also known as "wp-admin") by typing "www.yoursite.com/wp-admin" in the web browser. Log in using the credentials you set during installation.

Step 4: Choose and Install a Theme. WordPress offers a variety of free and paid themes to customize the appearance of your site. To choose and install a theme:
- In the WordPress control panel, go to "Appearance" and then "Themes".
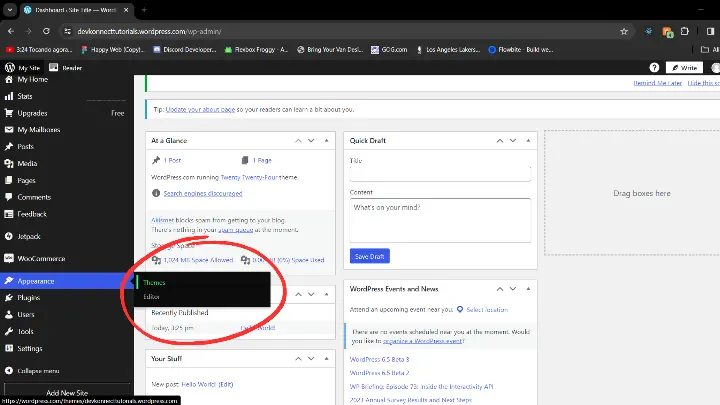
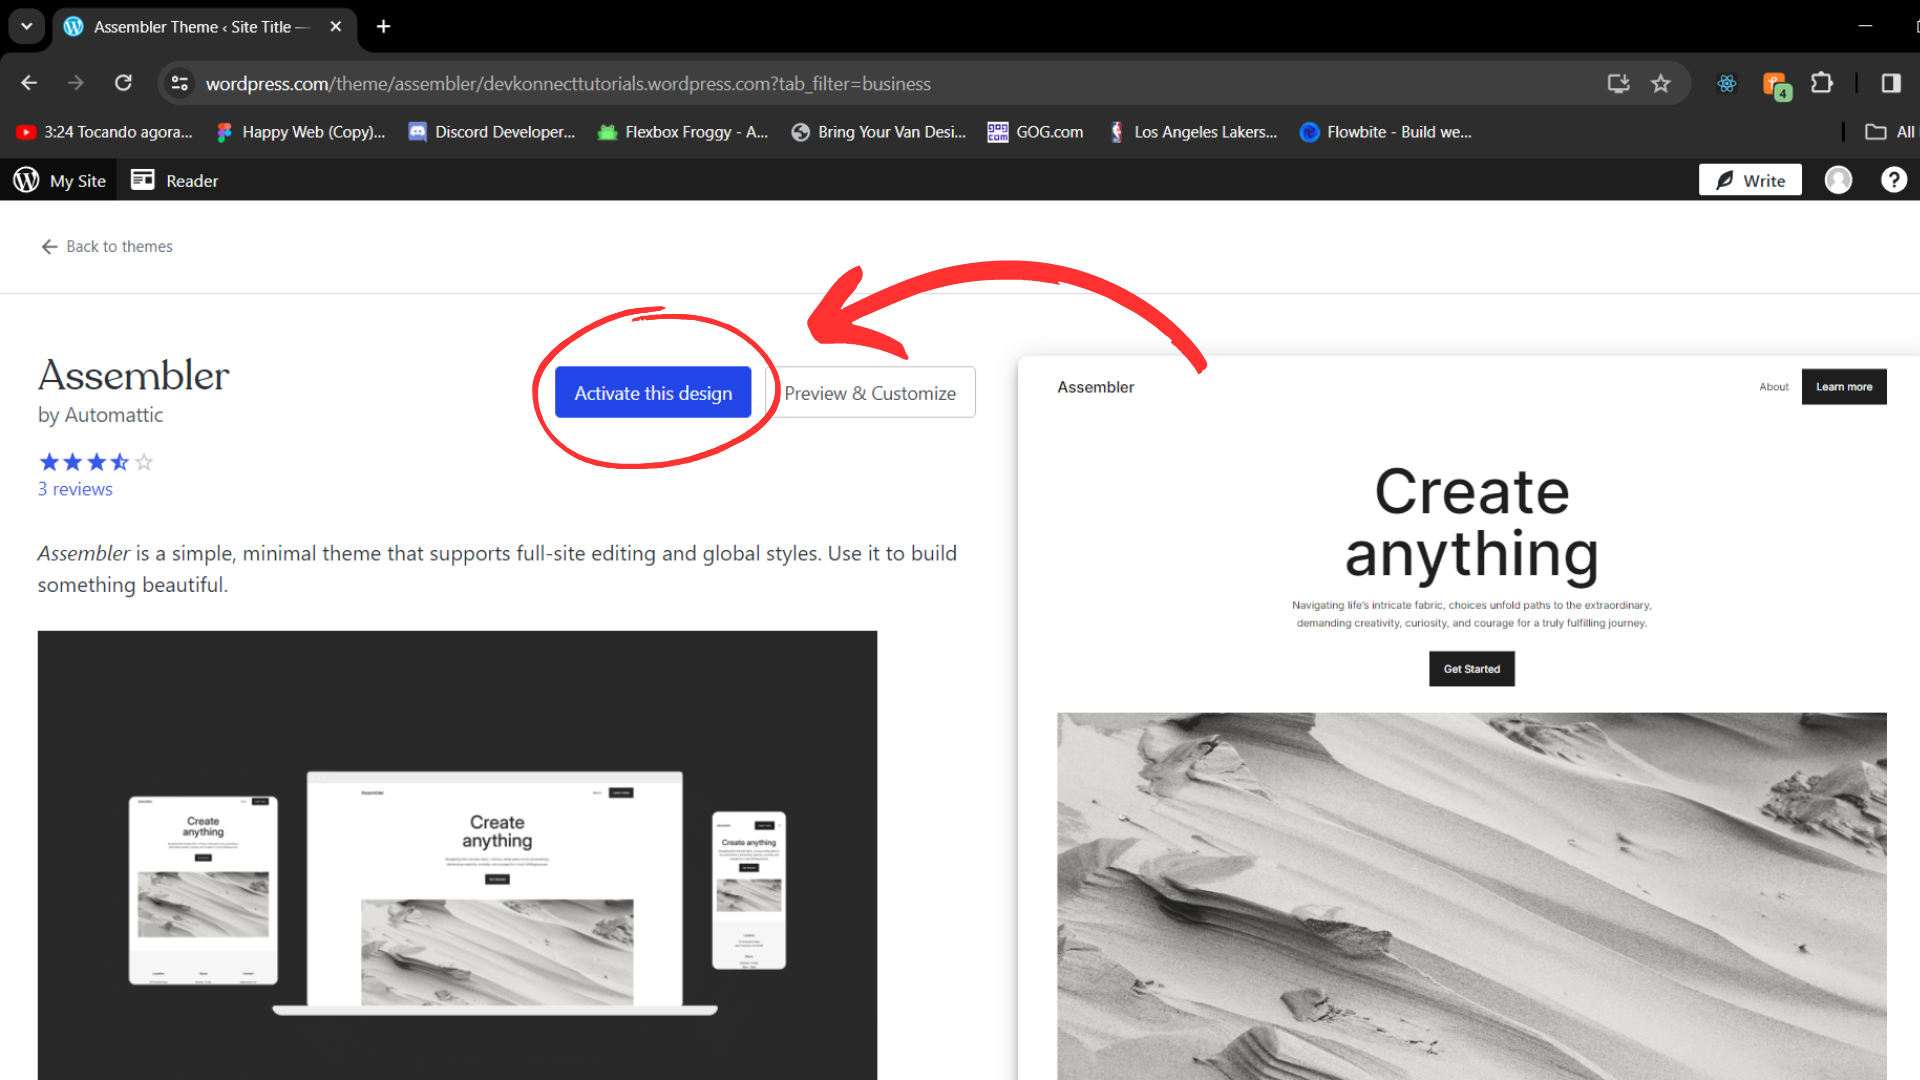
- After finding the desired theme in the theme listing, click on "Activate".
Another option is also to install a page builder like Elementor for example. Installing a page builder is not mandatory for a WordPress site. You can create your site using only themes. However, page builders make it easier to customize the appearance of a site using drag-and-drop editing.
Step 5: Customize Your Site Access "Appearance", click on customize to edit the appearance and settings of your site.
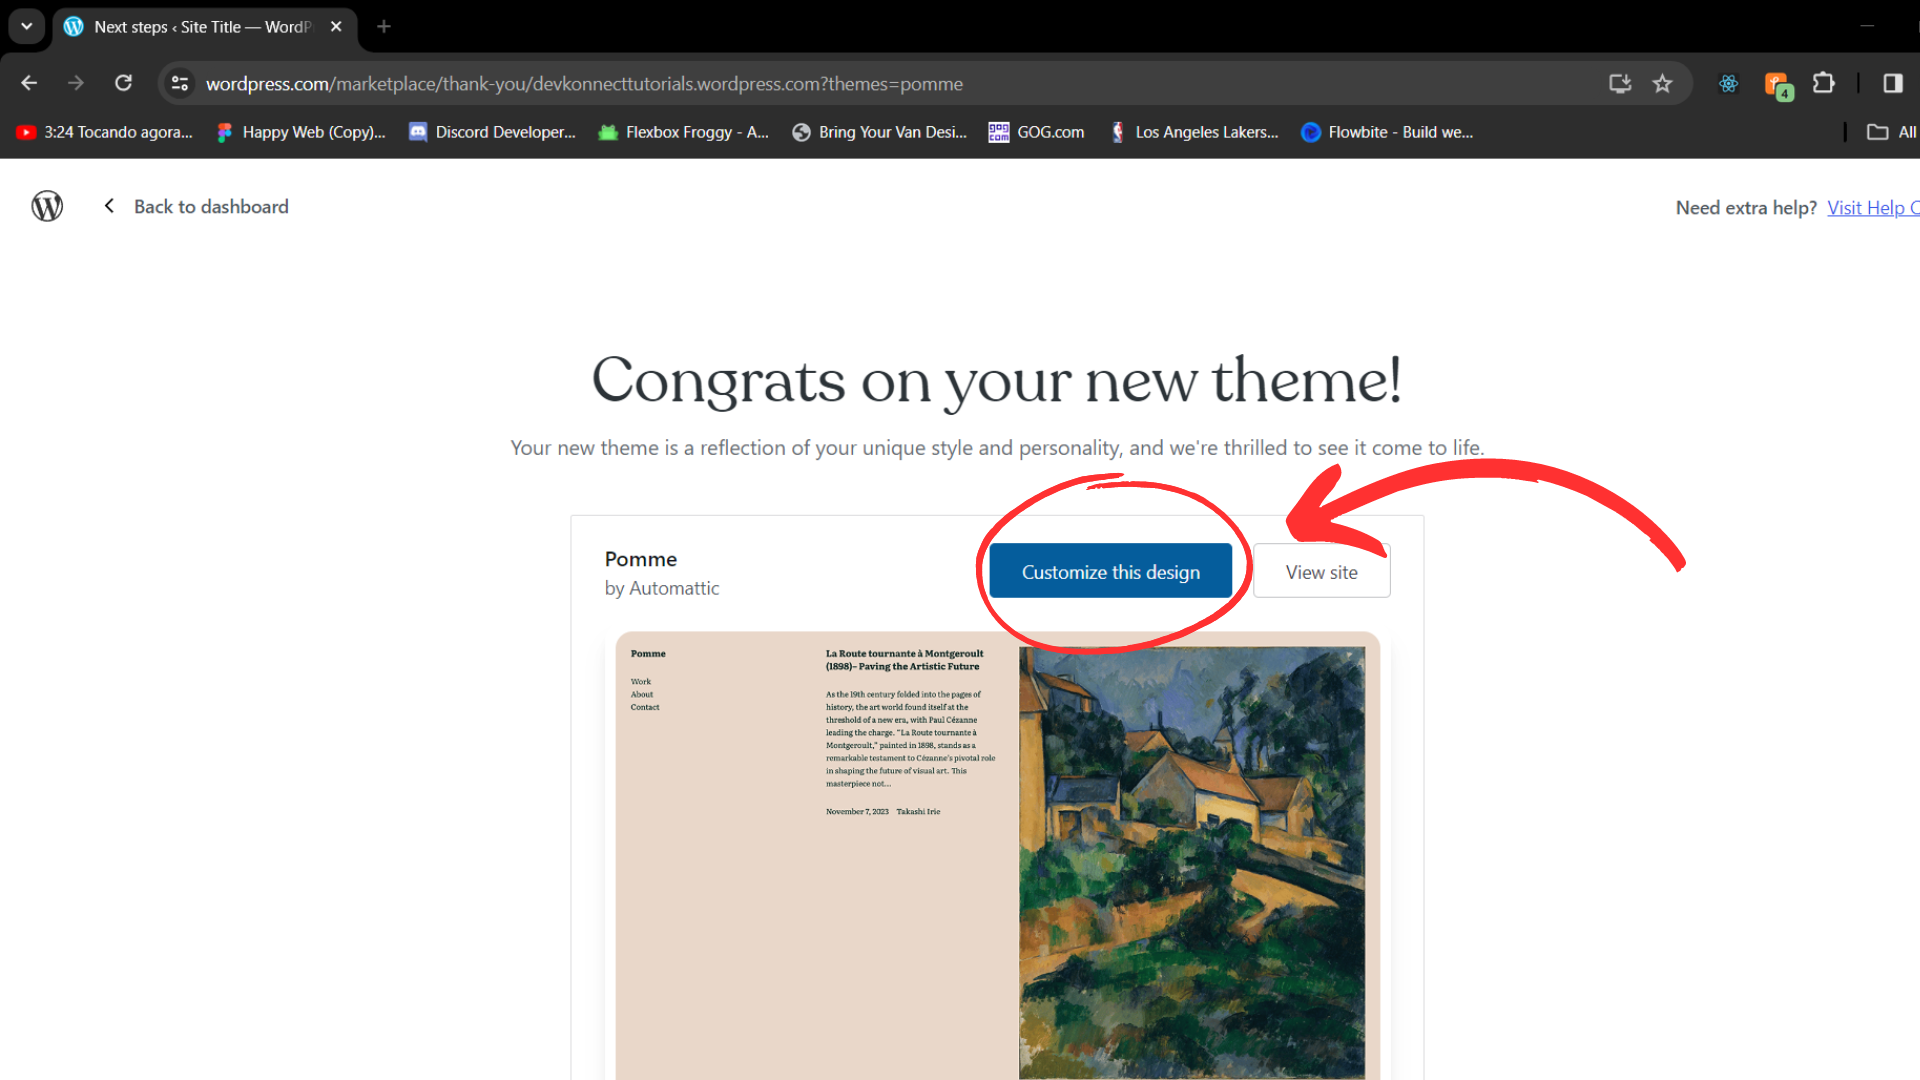
You can change the header, color, font, add a logo, and more.
Step 6: To Create Your Pages Go to the WordPress control panel by clicking on "My Site" at the top left.
Click on "Pages" in the sidebar and then on "All Pages" to create your pages.

Step 7: Add Content Click on a page to edit it. Use the block editor to add text, images, videos, and other elements to your content, as I will show in practice in the example below.
By clicking the button at the top left of the page, you can add elements to your page.
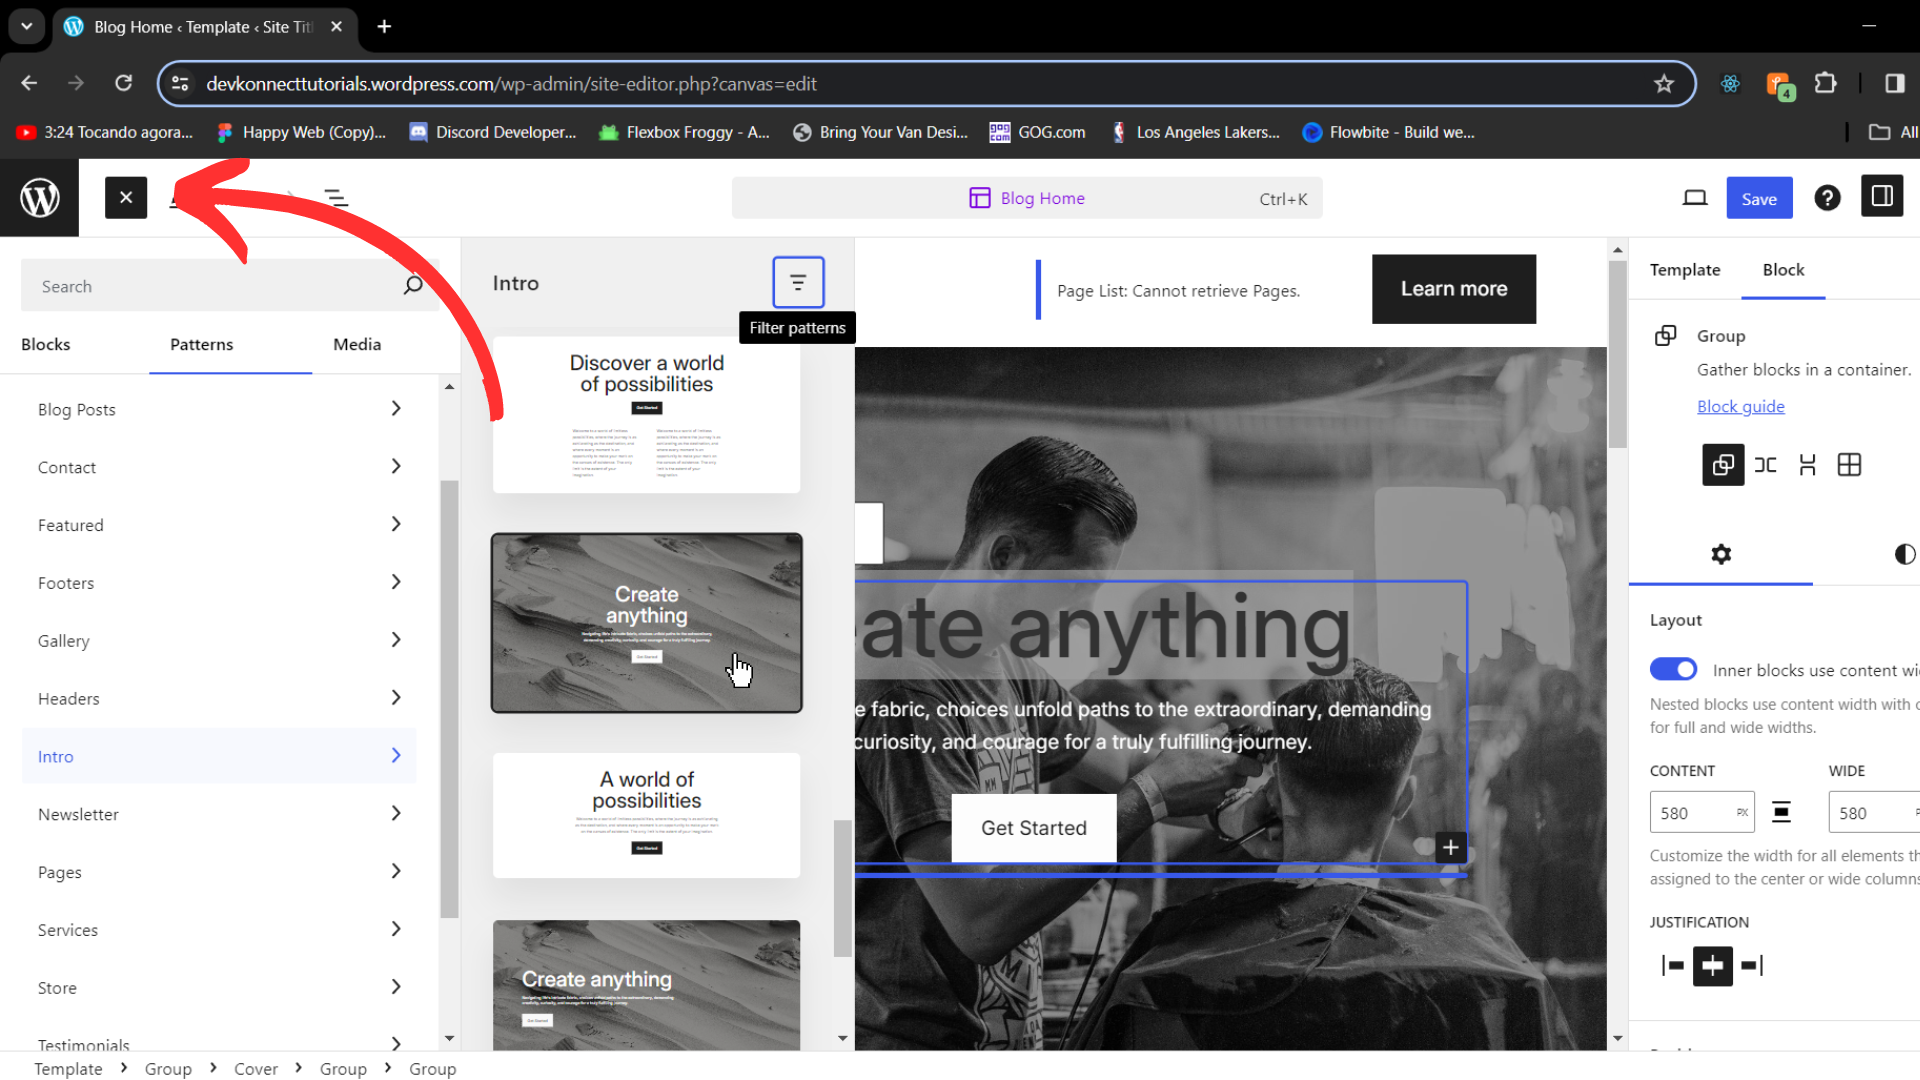
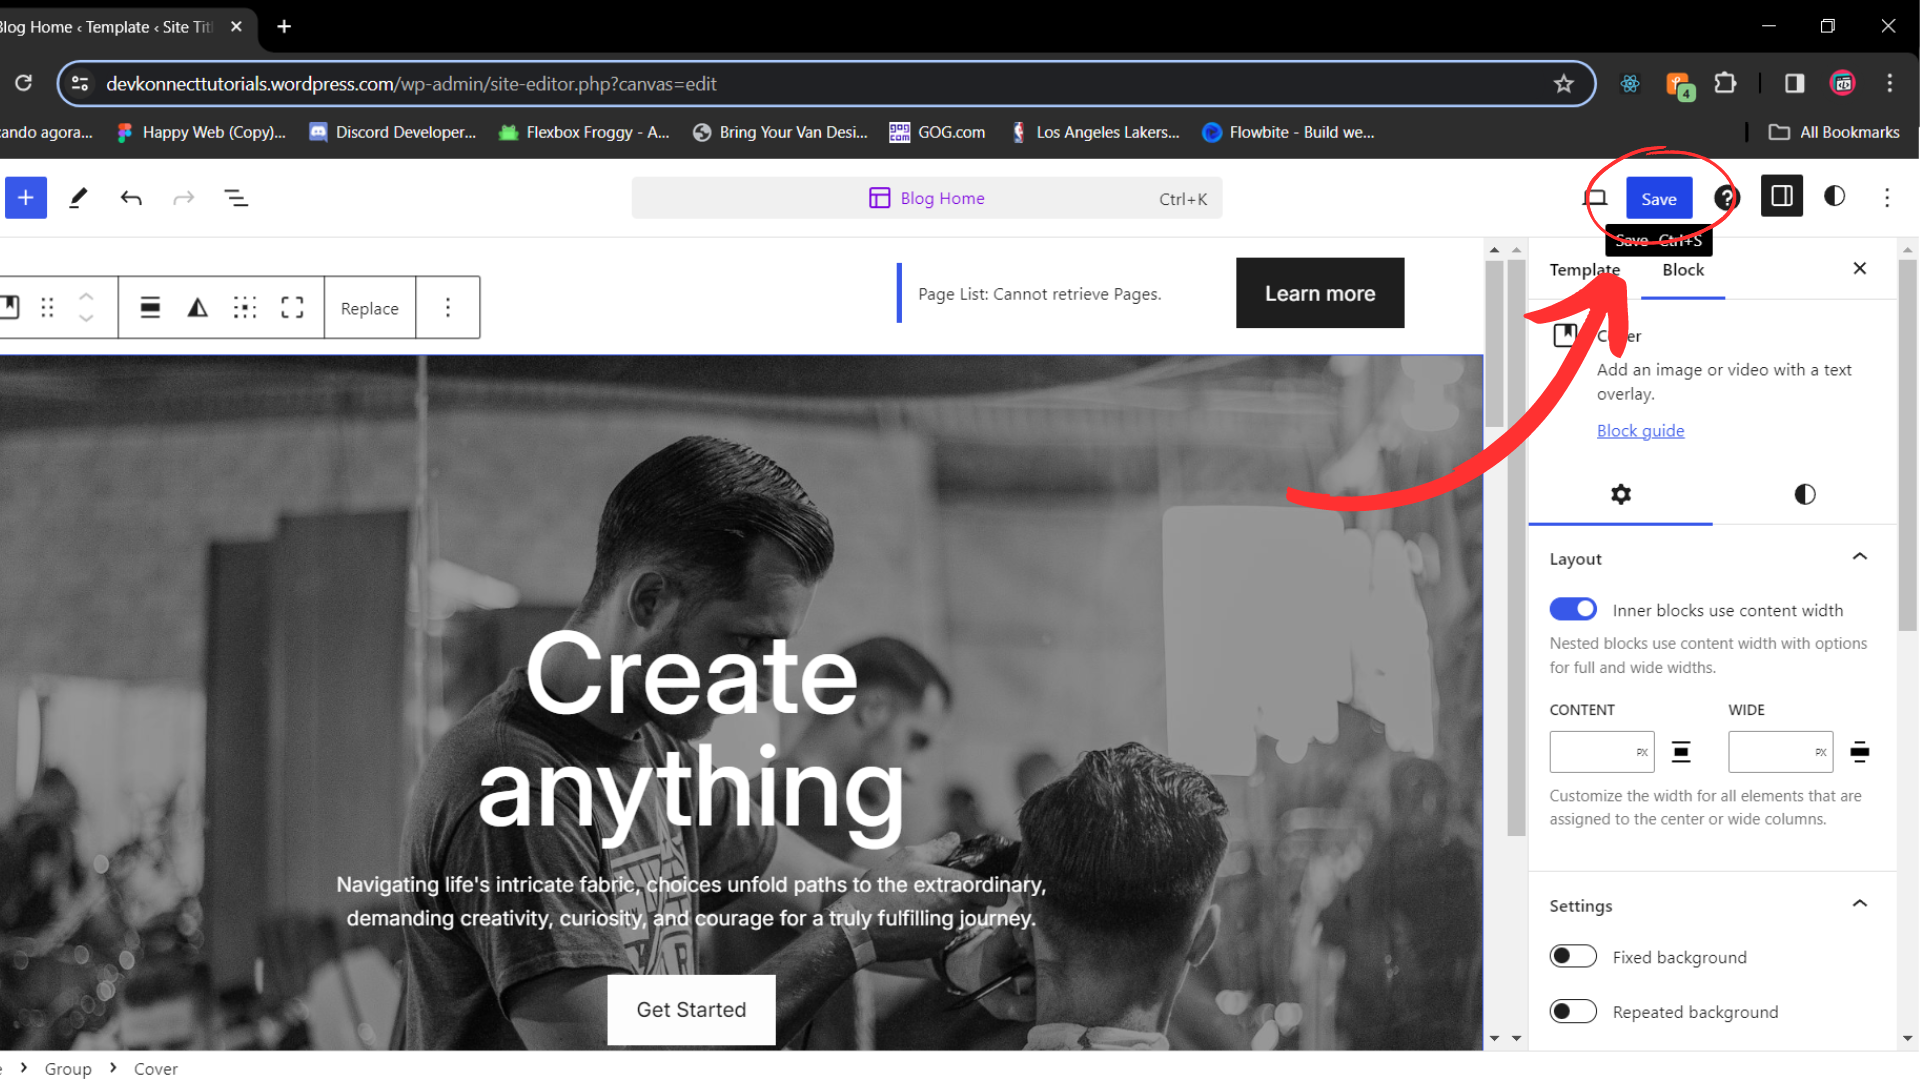
Start to edit the main page, and make it your own!
When you finish editing your site, click on “Save” at the top right of the page.
Step 8: Site Settings To make settings on the site in the control panel click on settings.
To add a Favicon, click on settings as in the example below. The Favicon is a small icon that identifies a site and is displayed on the tab and the home screen of internet browsers, on mobile results from Google, and in the favorites section. The favicon is important to reinforce the credibility of a page because it connects the user with the respective brand.
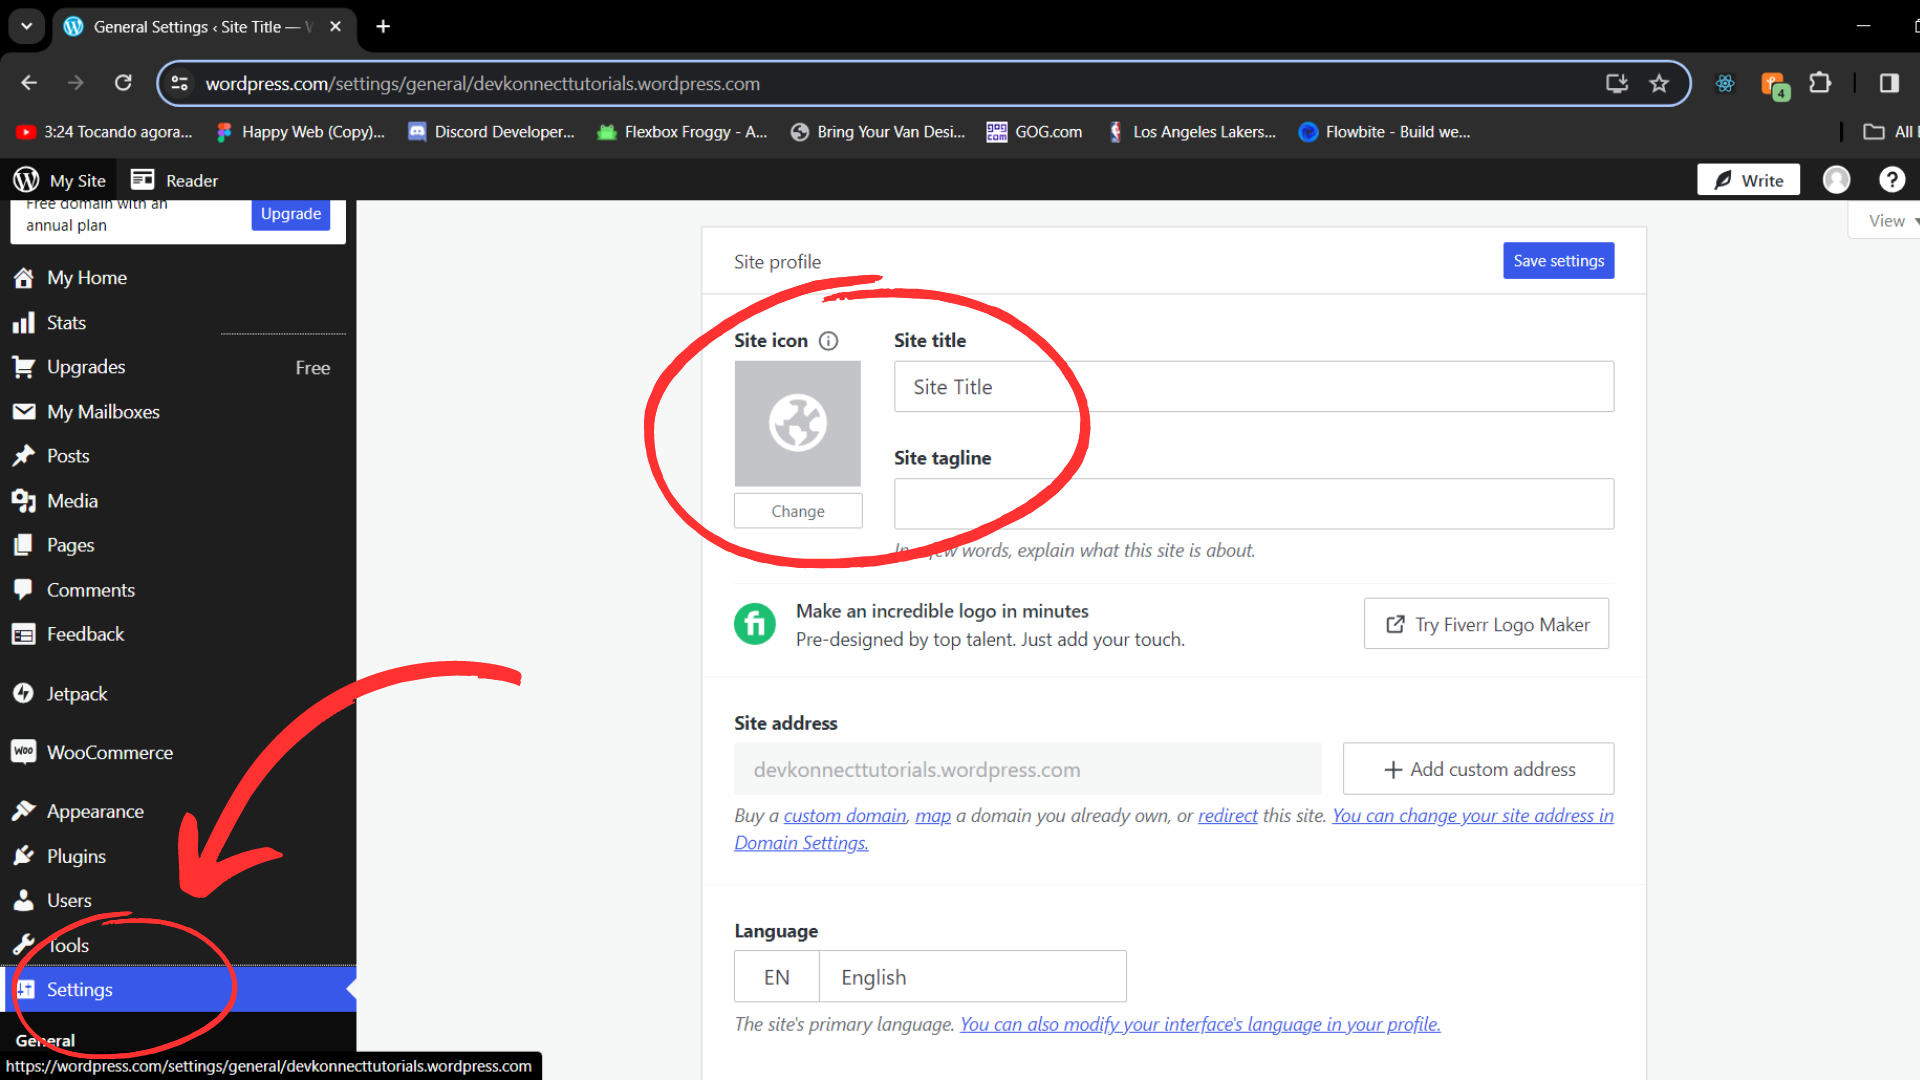
Then add the title and description of the site. The title and description of the site appear at the top of the browser window of the homepage of sites. This helps the user to quickly identify the site they are on through the browser bar.
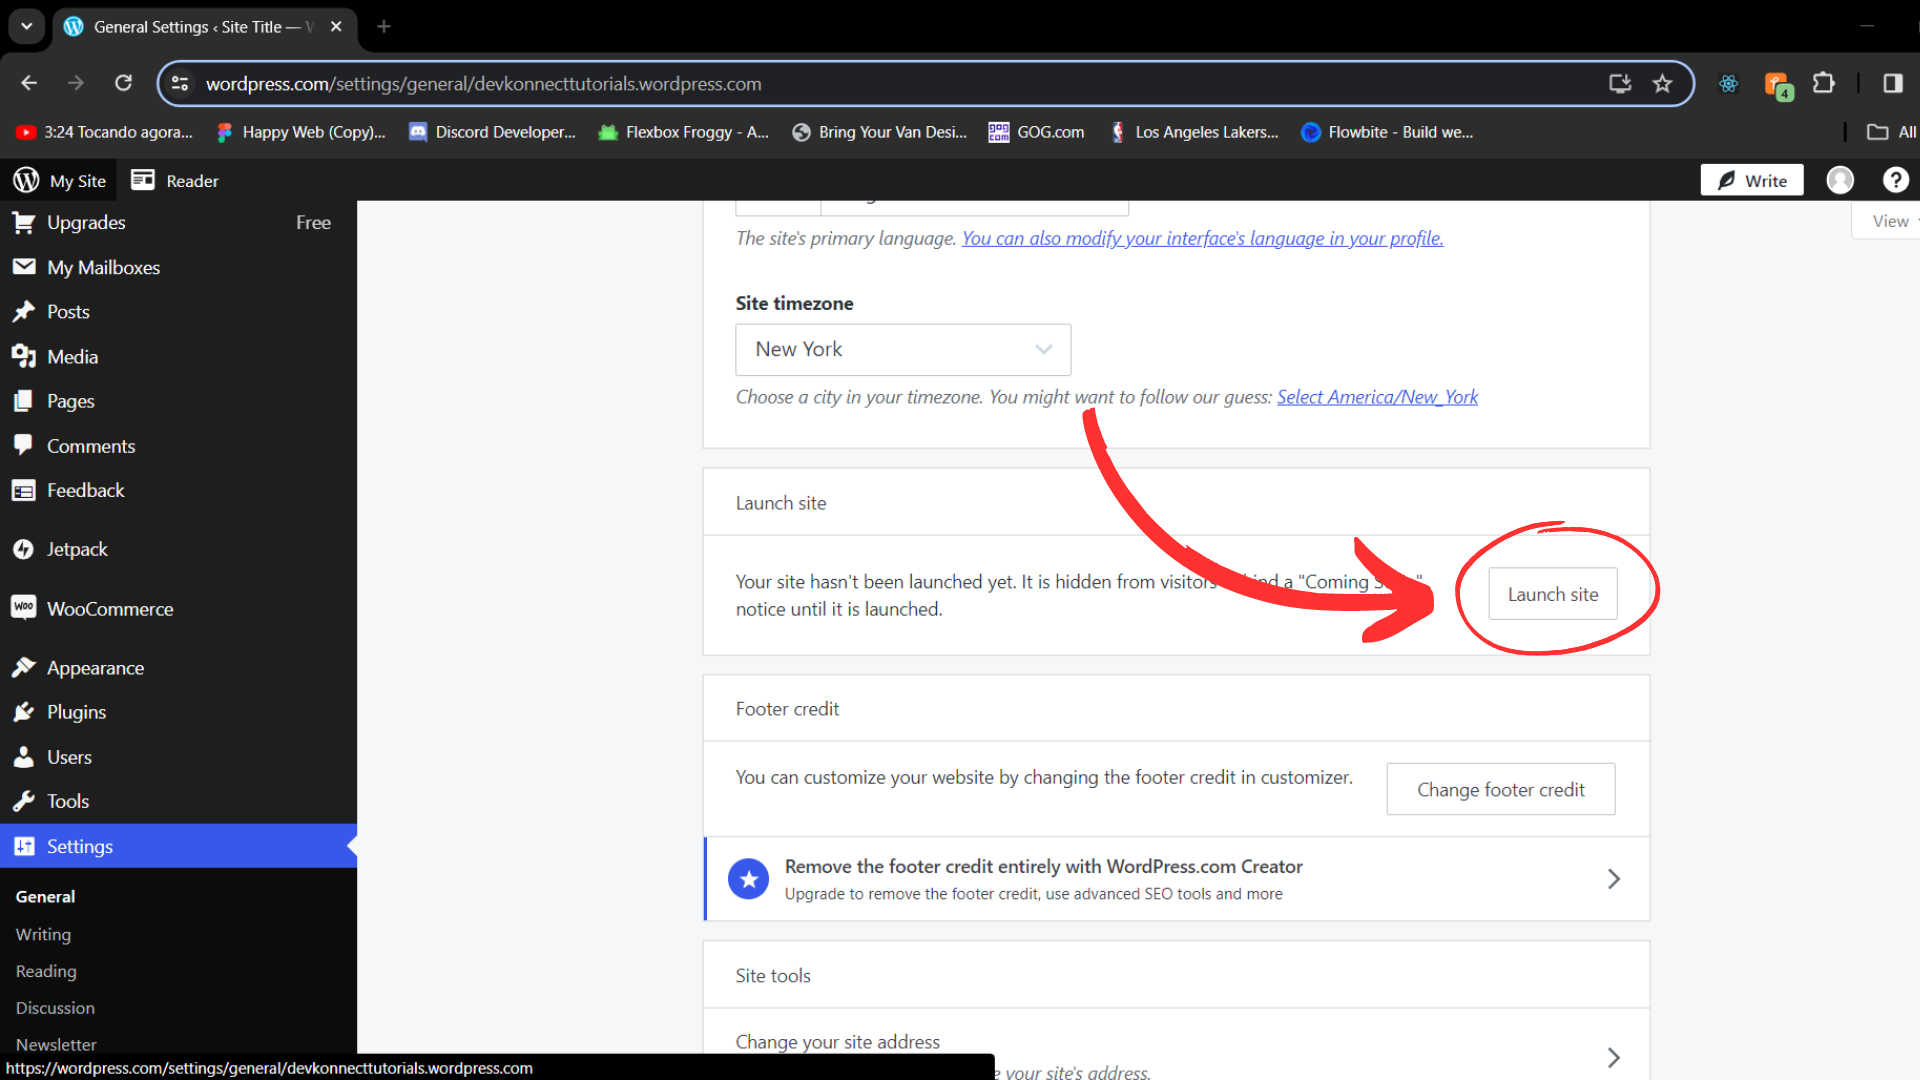
Step 9: Publish Your Site When you are satisfied with it. Click on the "Launch Site" button to make it accessible on the internet.
Perfect, we have finished the example site!
Remember that this is just an example, and you can customize the content according to the identity of your brand and the products you offer. You can customize, add more content, and explore the many options and features available on WordPress.com as you become familiar with the platform.
What to Make Sure Before Publishing Your WordPress Site?
After completing the entire process of publishing your WordPress site, there are a few things you should check.
Check everything again - Even after finishing everything, make sure to check everything and each one, starting with the content, button, link, image, and other elements. In general, you should make sure that it contains all the sections you planned.
Test the responsiveness of your site – Responsiveness is mandatory in modern websites. That's why you should always test your site on different devices before launching it.
Set up Google Analytics – After launching, you need to track how many visitors you are getting, their demographics, and their behaviour on your site. To get all this data, you need to set up Google Analytics on your site before making it public.
Optimize your site for SEO – Without SEO optimization, no one can find your site on the internet. That's why SEO optimization is mandatory for any site. Consider installing an SEO plugin and optimizing your pages and posts for SEO.
Responsiveness - Your site also has to be responsive, meaning it has to adapt well to the computer screen but mainly to the mobile screen, which is where most people access. So remember to check how your site looks on different screens like mobile, tablets, and computers.
Conclusion
Remember that creating a professional website is an ongoing process of learning and improvement. Continue exploring WordPress features and keep your site updated to ensure it remains professional and attractive to visitors.
Would you like a consultation to help you?
Don't miss the opportunity to stand out in the digital landscape. Let's take your business to the next level together.
Contact us now to schedule a consultation and start your journey to online success. Your competitors won't wait – why should you?